If you have been following us on instagram and facebook, you may have seen our previous posts about our current project, #lakeshorerestore. A little background on this project if you are not caught up can be found in our previous post, A Deeper Dive into #lakeshorerestore. Keep reading to learn even more about this project, what we are changing, and our thought process behind the alterations happening in each space!
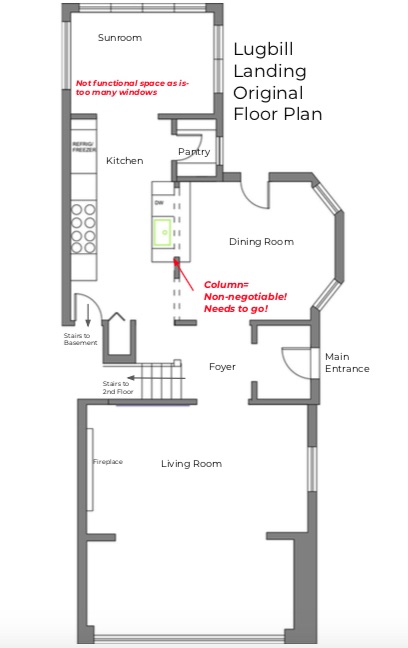
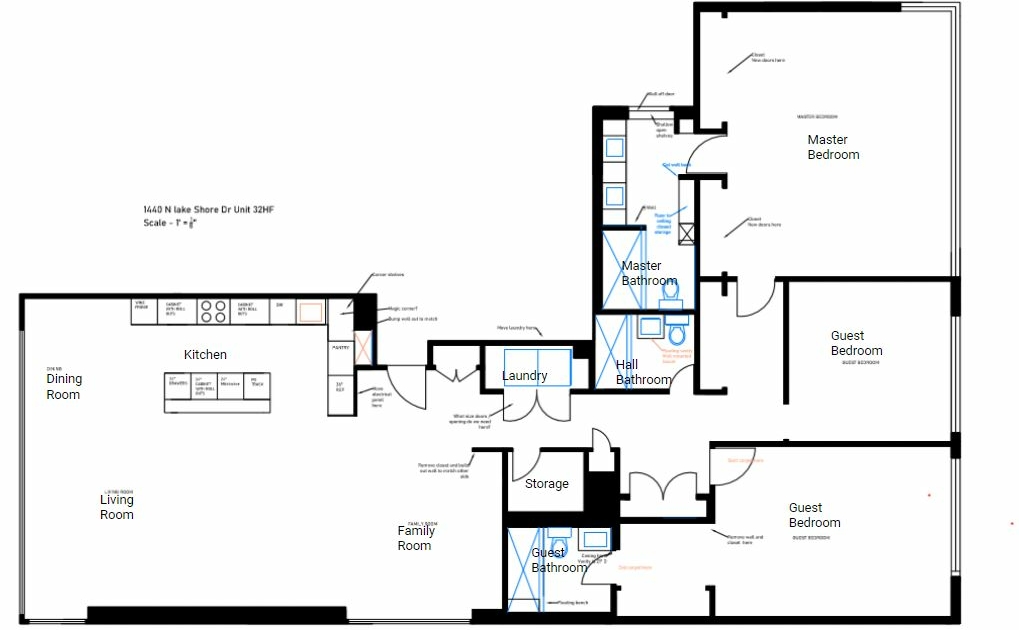
Original Floor Plan

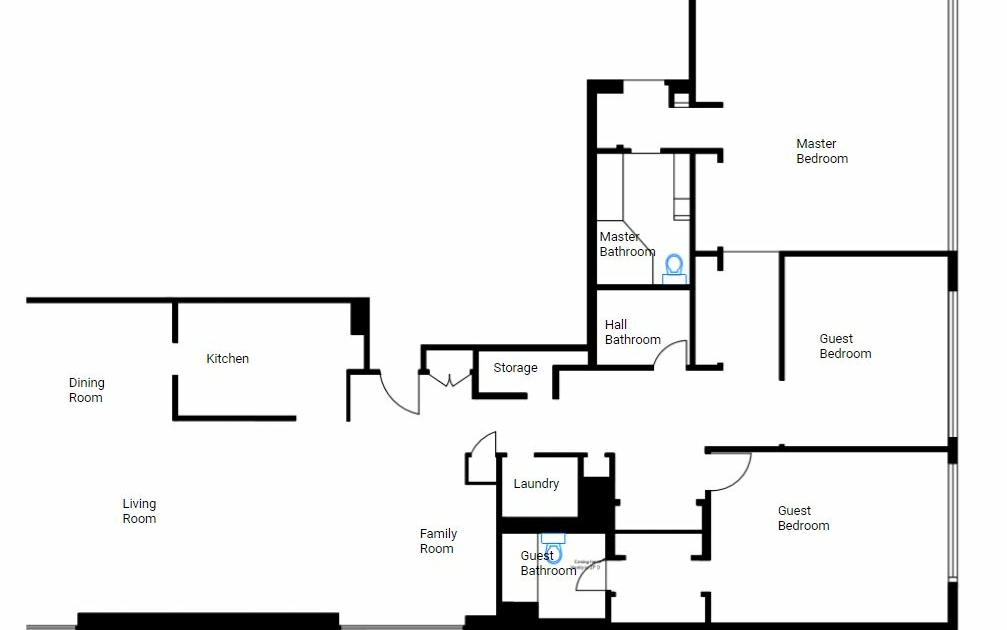
New Floor Plan
As you can see, we didn’t make any MAJOR changes to this floor plan – all rooms are staying generally in the same location. However, we made multiple minor adjustments that will lead to major improvements.

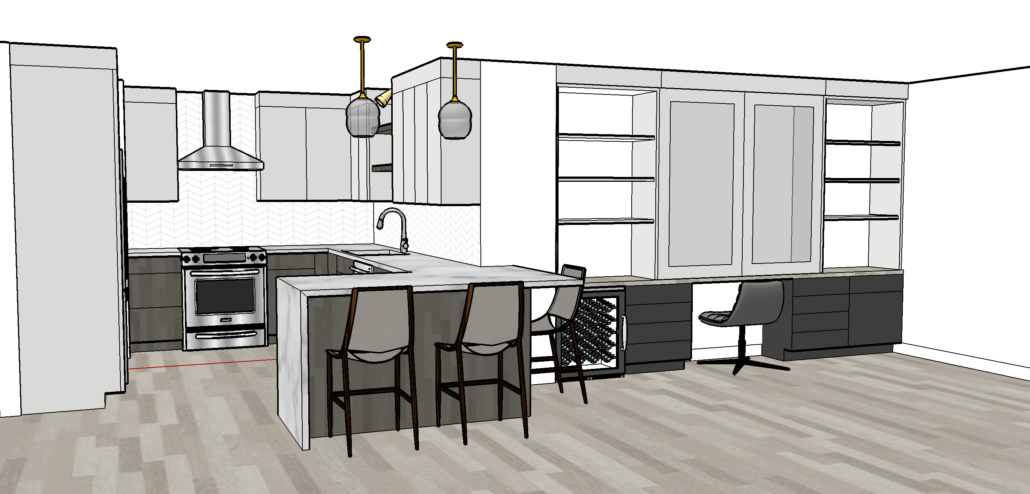
Kitchen Layout
Kitchen Layout
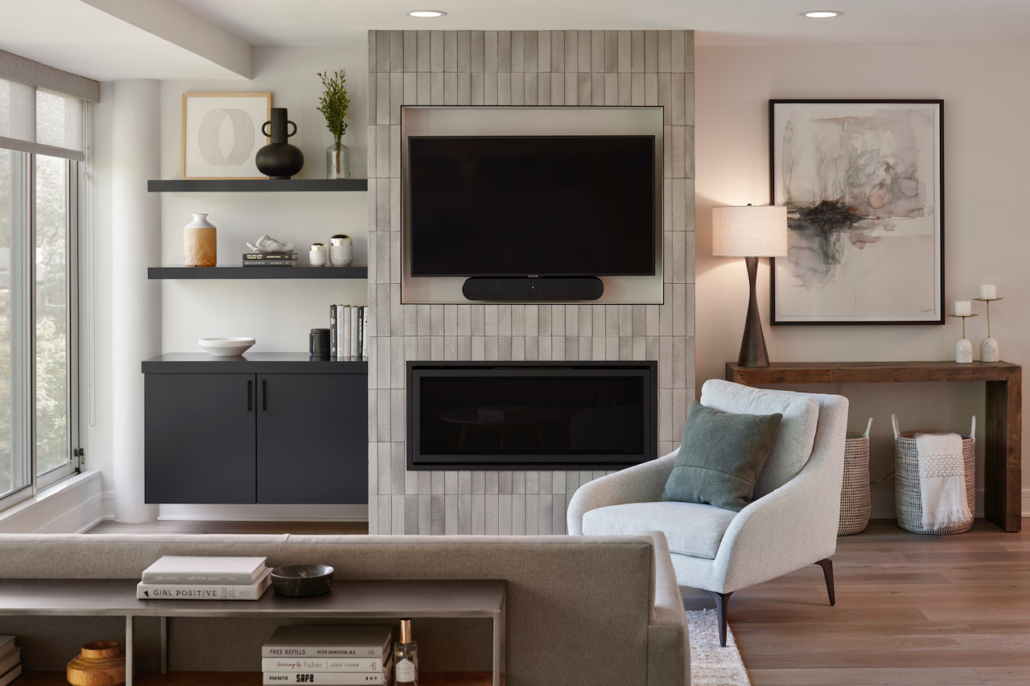
First and foremost, upon walking into the space, you notice how closed off and separated the kitchen is from the dining and living space. The kitchen feels small and cave-like with the dropped ceilings and outdated cabinets and appliances. It was a no brainer to take down both the wall to the living room and the dining room to create an open space that made the whole area feel much bigger and way more functional. The main thing our client wanted was an island, so we went as big as we could without overwhelming the living space. The island will offer plenty of seating for this couple, and will be perfect for when grandkids come to visit!
We can already envision the family gathering here (which is what usually happens any time there is an island). A few other design elements we wanted to include were some open shelving with lighting to open up some visual space with the cabinetry. We chose a small spot in the kitchen to include this feature so we could be sure not to take away from the much needed storage space. We also included a wine / beverage refrigerator towards the dining room end of the kitchen for easy access while serving guests.
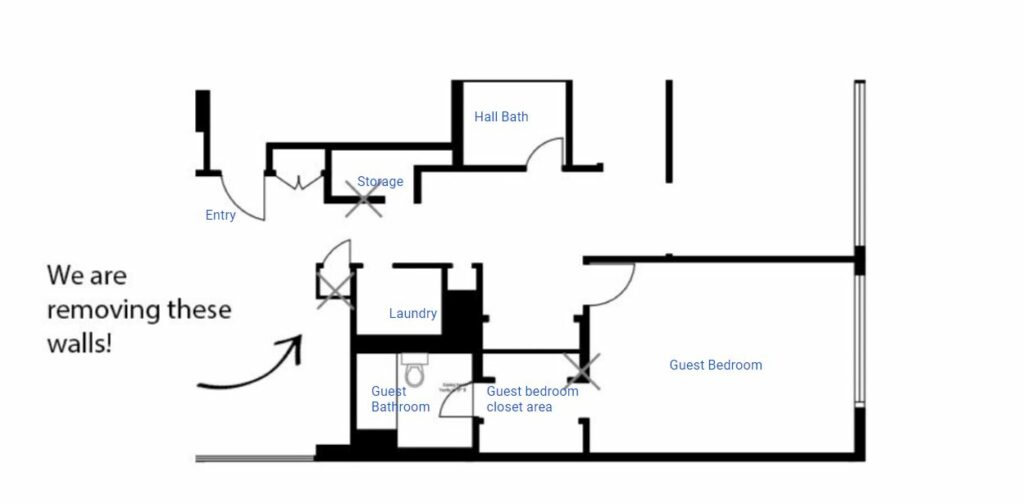
Hallway into Guest Room

New Hallway Layout
Next, we move onto the family room, hallway, laundry room, and guest area. Look closely and you’ll notice a few big changes. The first thing we decided to do was remove the closet closest to the family room, and open up the family room recessed wall. The closet wasn’t necessary since there was plenty of storage space already, which made the decision easy. Next, we moved the laundry room from the right side of the hallway, to the room on the left. We added a second door and made the doors open up like french doors to allow access to the side by side washer and dryer – a huge improvement from the small and awkward previous laundry space which could only house a stacking washer and dryer comfortably. This will now be a coat and linen closet. The hallway bathroom floor plan remained the same (the transformation in this room is still going to be huge – keep an eye out for finished photos!) since we didn’t have much flexibility due to the location. Not to mention, it was already a great size for a hallway bathroom!
We wanted the guest bedroom and bathroom to feel more inviting and comfortable. The room already had some great built-ins to work with, but an overly crowded closet area. By removing one set of closet doors, we allowed for open space for a bench, freestanding furniture piece, or anything else the clients think their guests could need while still allowing a full closet for storage. This was another small – but big impact – change that really made a huge difference.
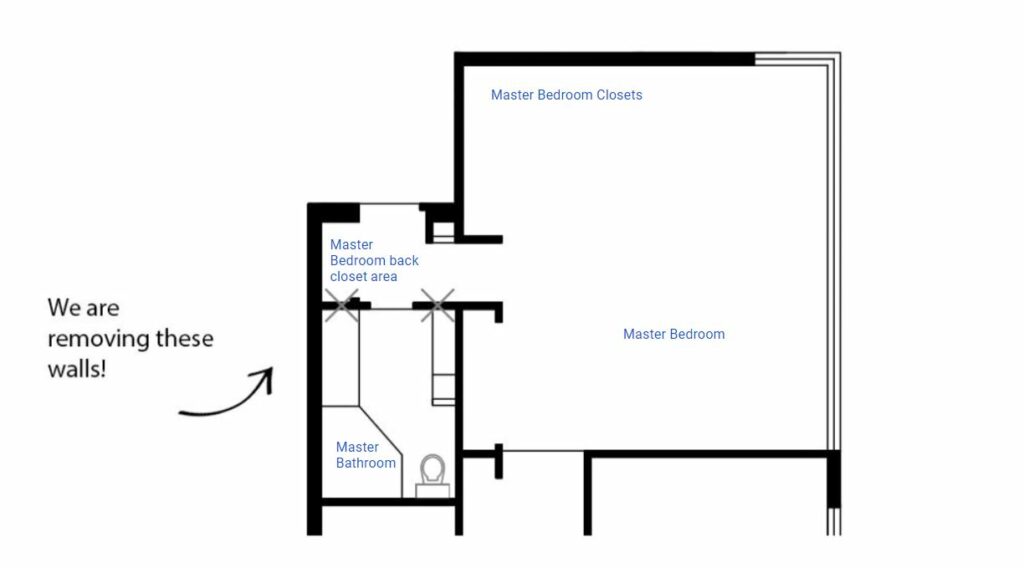
Old Master Bathroom
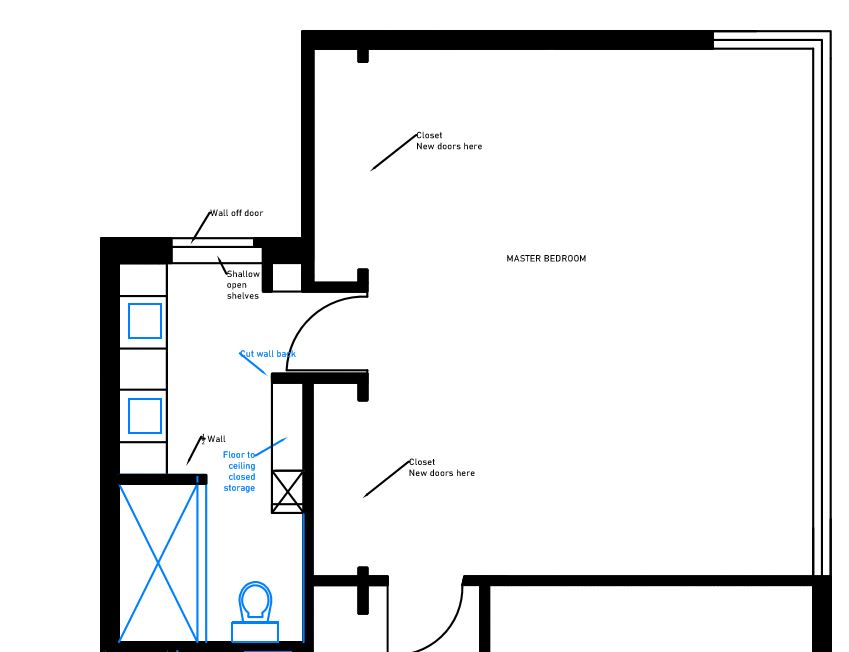
New Master Bathroom Layout
The master bathroom is definitely the bathroom with the most changes! Originally, the bathroom had two separate sink / vanity areas, one on either side of the room. It also had a separate closet area right outside the bathroom before walking in, with tons of closet space in the actual bedroom area itself. We decided to extend the bathroom into the back closet area and create a double vanity with sinks, and use the other side of the bathroom as floor to ceiling linen storage. The angled shower was also widened and straightened out to make the space feel more open.
We are really looking forward to sharing more of this project with you as progress is made throughout the unit, and we absolutely cannot wait to show you the finished result!